For long, straight, stand alone countertops you can determine the dimensions of your countertop(s) by measuring the cabinets and adding the overhangs. Good templating is essential for a smooth installation where complicated seams, corners, cutouts and other considerations exist. You can create your template from cardboard or thin, 1/8” x 2”, Luan plywood strips.
Use a hot melt glue gun to fasten the strips to each other and use bracing strips to keep it square and true. Make sure to leave a 1/8” gap for every 10’ of countertop anywhere there are walls or other permanent obstructions at both ends of the countertop to allow for basic expansion and contraction. Leave 1/4” gap per 10’ anywhere the countertop will be exposed to heat from sunlight or where it is within proximity to heat-emitting appliances.
Make sure that the cabinet boxes are level and securely in place before you begin creating the template. Also, check that the cabinets are open at the top so that air can move under the finished top to provide cooling if needed. If obstructions exist, cut away as much as possible without jeopardizing the cabinet integrity.
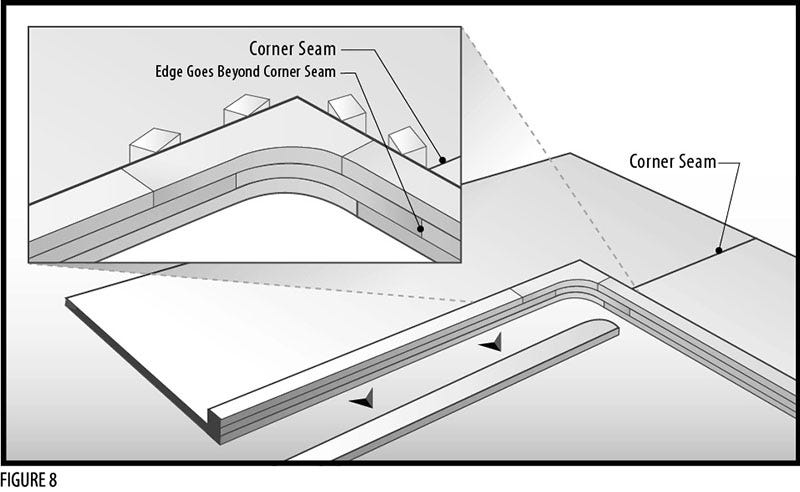
Deciding where the seams are placed is critical to the overall layout. Seams should be no closer than 3” from the edges of sinks and rangetops. At the inside corners, the seam should not be on a diagonal like a picture frame corner. Instead, place them 1-1/2” to 4-5 inches from the start of the inside corner radius.

Figure 8: Layout of Sheets for Corner Seam Location and Edge Buildup
Cut the two 1” strips, to be used for the edge buildup (discussed below), when you cut away the strip along the front edge of the material to make either the inside radius, or to reduce the depth of the countertop to 25”.
